How to Install a Nest Thermostat

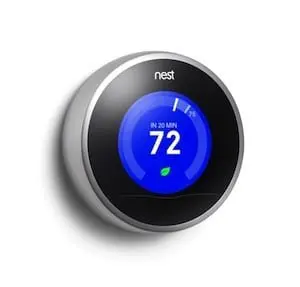
If you haven’t heard of the new smartphone-controlled thermostat called Nest, then you are in for a treat. This intelligent and self-learning device can help you save a lot of money on your energy bill by creating personalized schedules and automatic away functionality, and connecting to Wi-Fi so you can control the temperature in the house from virtually anywhere. We here at Western Heating, Air & Plumbing created a quick tutorial to explain how to install Nest thermostat technology in your own home.
The Prep Work
Before you begin this tutorial on how to install Nest thermostat equipment, switch off the power to avoid being electrocuted or shocked. Although it isn’t likely to happen, you can never be too careful when you’re working with electricity and wires.
Remove the cover of the existing thermostat and take note. Pay attention to the current configuration and where the wires connect. It’s a good idea to pull out a smart-phone and snap pictures before you disassemble. Then move onto disconnecting the wires and removing the thermostat.
Installing Nest
Once you have successfully removed the existing thermostat, label the wires with the blue tabs included in the Nest manual. Since your new Nest thermostat has a built-in level, use it to straighten and make marks for the exact location of the Nest on the wall. Attach the base with the included screws.
Reconnect the wires by following the labels and the wire chart. The grey buttons that surround the thermostat will depress when a solid connection is formed. Plug in the Nest display and turn the power back on. You are now ready to setup the nest by locating your Wi-Fi network, entering the password and connecting.
If you have any troubleshooting problems when learning how to install Nest thermostat equipment, give the professionals at Western Heating, Air & Plumbing a call. We take great pride in being your Orem, UT HVAC experts and offer fast, reliable service with satisfaction guaranteed.


